Showing posts with label quick crafts. Show all posts

Friday, January 25, 2019

Crafting on a budget

It’s Friday - I thought I’d share some low cost crafting ideas. This will serve as a crafting on a budget idea as well as some simple holiday home decor ideas. 

For this Valentine’s Day project all you need is paper and a paper punch. Notice how I used a circle punch (it was closest to me) but of course you could use a heart punch or even a star punch. If you only have small punches, those will work too. Just make more punch Outs and have the garland extend longer. Easy fix. 


Grab your supplies - I prefer double sided paper that way you dont have to worry about how your garland is laying and won’t see a white back unless of course that’s part of your color scheme. 

Punch the circles 

Again using what you have - if you only have one sided paper just glue 2 pieces together 

Sew the circles together in a long chain. 

Cute right? 


See how cute and “sew” simple. You could do this for every holiday and save for another holiday or party. Or if you used your scraps - you can toss it when your done with it. 


I love it. 

Here’s to crafting on a budget. 

have a beautiful weekend friends.!

Tuesday, October 23, 2018

Halloween Trick or Treat bags

Hey ya’ll wanted to share a fun craft you can do with your kids for Halloween. 

My kids are 18, 16, and 11 so we have gone through plenty of Halloween trick or treat bags - we started with the typical orange plastic pumpkin - the one that cuts into your hand when it’s full of candy. 

We tried the pillow case - which leaves kids disappointed when they don’t get the whole case filled because really that could weigh 50 pounds if filled 

We also had grandma make some which were cute but small...so now, today for this Halloween, I made some more practical customized treat bags 


I started off with these blank canvas bags which could work to throw over your shoulder if the bag gets to heavy and for bigger kids they can hold it from the handle without it dragging on the floor 😁


I asked the kids what they wanted and I just drew the image on the front and had them paint them
(truthfully I did 2 because my kids are at school today but my daughter did paint hers) 


Choose your colors and paint brushes - these bags are nice and unwashed which helps with the paint going on and is forgiving - note: if you use a pencil like I did some of the colors of paint do not cover up the lines so definitely don’t use a sharpie unless it’s part of your design. 

Also, if you are using acrylic paint it will seep through the bag so be sure to add something inside the bag before starting to paint, such as a piece of card board. 

Once it’s done be sure to cover with an old towel or cloth and iron just to secure the paint if you want. You shouldn’t  have to wash these bags since the candy is mostly sealed - 
So you could just hang up for next year.!


Cute right? My old east painted in my penciled drawing 


And customizable to each child or friend. 


I’ll have more to share tomorrow after our fun filled evening we have planned - stay tuned. 

Happy Crafting friends

Tina

Friday, January 12, 2018

Valentine’s Day Craft

Let me start by saying WOWzers the Valentine items Target had on sale before Christmas were Amaze-balls! 

I loaded up with goodies the minute I saw it out❣️

Slim pickings at this point but this is just a starting point for you - an idea using the stuff I got from Target but I’m pretty sure you could also find things similar at the dollar tree or 99. Cents store 

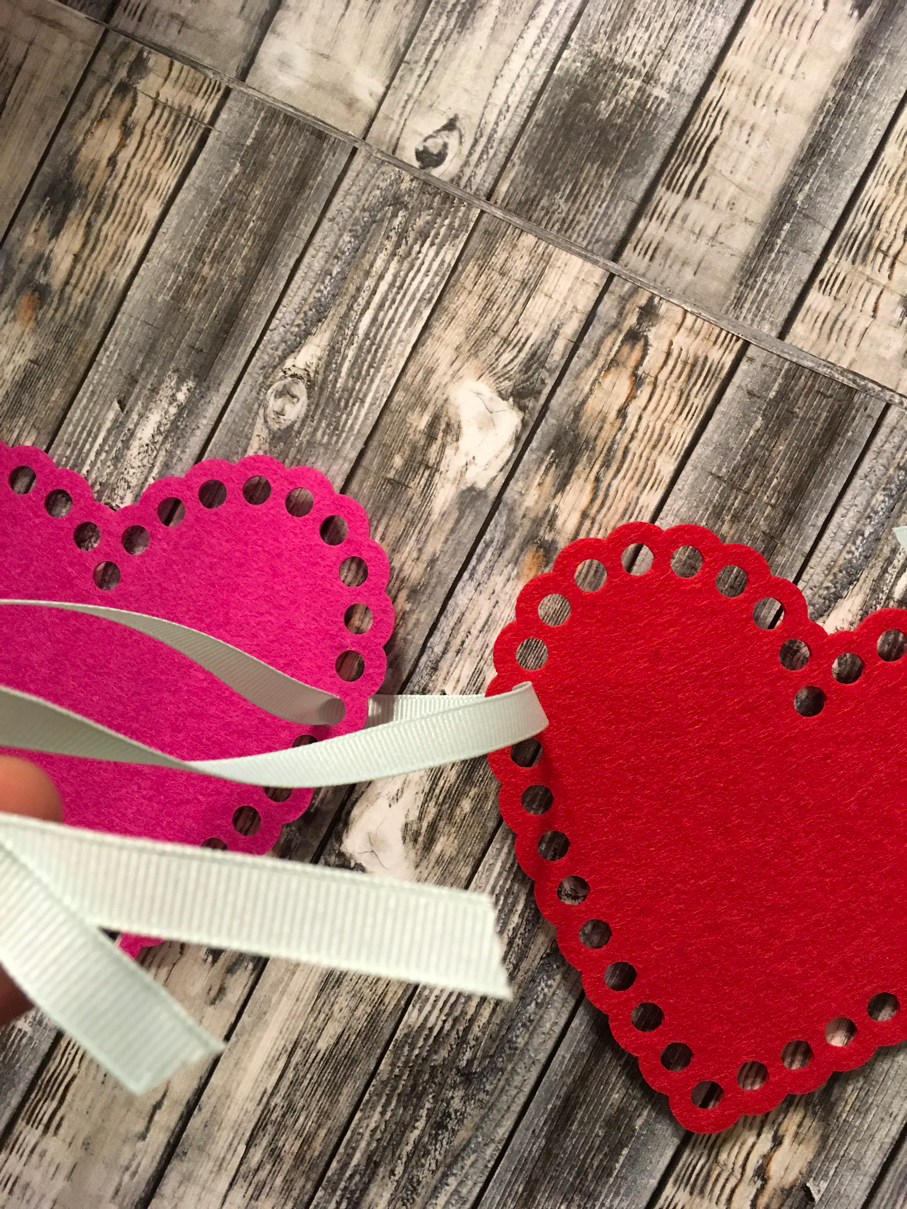
So grab some felt hearts - these came in super big sizes with the cute scallop edge...

All you need is felt hearts - in any size - and some ribbon 

The holes made the hearts easy to string 

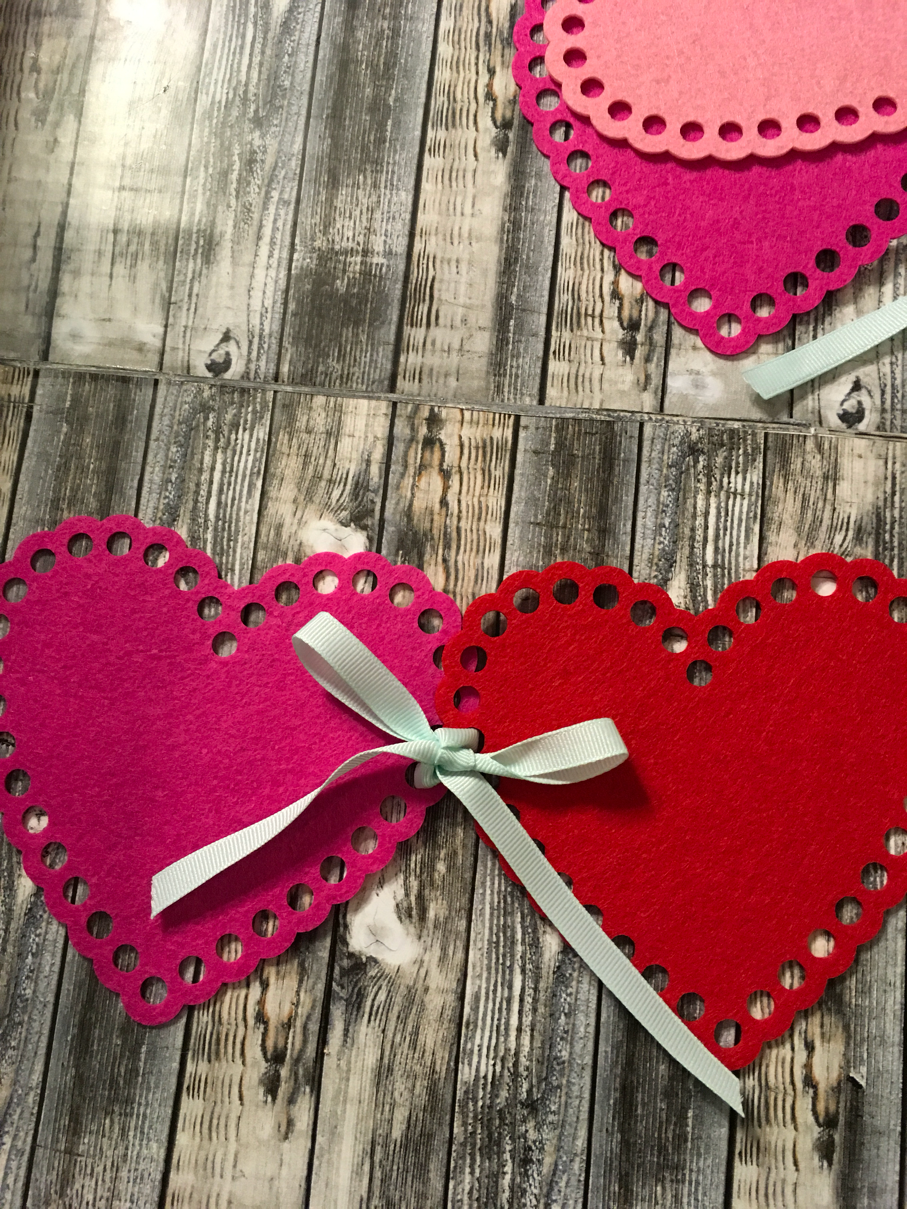
Just thread the ribbon thru the holes, make sure they are close to the same area on each heart just to ensure they hang right 

I cut a length of ribbon to connect each set of hearts 
And made the ribbon long enough to be able to tie a bow 

Once all the hearts are strung just add some long pieces at each end and use those to hang from your mantel or even a book shelf 

Simple and only cost a dollar and 10 minutes worth of my time!!!

Another crafty girl idea!!!

Happy crafting ya’ll 

Wednesday, June 7, 2017

Crafty Girl Ideas #2

Here is another episode of

CRAFTY GIRL IDEAS

If you know me and this here ol blog then you know I am an avid paper crafter more specifically a scrapbooker and with that skill - there are always left over paper scraps and embellishments from used kits. 

I usually make mini paper bag album kits to sell - so that you can make something at home in your own style - well I also like to make tags and add them to packages when I ship out purchases.
I made a quick video to show you what and how easy they are to make 

enjoy


We are in full summer mode here at Casa Curtis - all the kids are off and we are slowly filling are summer calendar up with fun things to do.

Happy Hump Day!!!

xo

Monday, January 9, 2017

Quick Craft-Christmas Ornaments

I have teenagers and a small boy at home and this year when we were putting up the Christmas decorations they were making comments that I had TOO much stuff - that I shouldn't put it all out every year, oh and wait for it - I should wait and put it out 2 weeks before Christmas - I mean have they lost their minds?

Anyway, I ignored their complaints immediately but when decorating the tree started - my sixteen year old decided she hated all her handmade ornaments especially the ones with her picture in them...wah - She didn't want to put any up...which made me a little sad - so I decided to make a new 2016 photo ornament...I wanted to share the process with you...because I think they came out super cute...

Here are the supplies - thick book board or chip board, buttons and photographs of your kids, and buttons. I used small instax photos but you could use their school photos as well.


I glued the the photograph onto the book board and punch a hole at the top


Then decorate with buttons or pom poms, or any other cute holiday decorations and surround the photo without covering up the hole...


then finish it off the way you like, I added a bow and the hanger to the back. the back of the ornaments are white so I had the kids sign their name and add the year so I could remember their signature and when the photo was taken. I plan on doing this every year...
My kids loved the ornaments but my oldest still didn't like her picture - but geez - you can't any prettier then that right? I think its a 16 year old issue...

Hope you like these quick craft easy tutorials and try them out for yourself.

Thanks for stopping by 
I will be linking this project up to the following parties.

XO
T

Tuesday, December 6, 2016

Quick Holiday Craft

I am all about the quick craft and even more so when the whole project costs under 15.00 then I just had to share the how, what and when with ya'll.

Pick up your supplies at the your local Target and heres what you'll need


The round wreath shaped wooden items are from the dollar spot at Target - 3.00 each - pom poms bags are also from the dollar spot and they are 1.00 each - - you could also use any you had on hand - the thick red ribbon was something I had and the red tassels are also 1.00 from Target...and of course you dont have to use what I used but this is how I made it.

First step is to find the middle and attach your ribbon (this will be the part you will use to hang the wreath from)


Looking back I think I would have spray painted the wreath prior to attaching the pom poms or maybe painted the edges with some acrylic paint - because since I didn't add the pom poms to the edge you can see some of the wood - luckily its hanging from our front doors and you can't see the edges too well so I am ok with it as is.

Once you are done adding the pom poms - then you can decorate it as you like. This can also cut down the cost if you use things you have on hand...

I bought some cute little snowflakes from Joanne for 40% off and painted them in turquoise then added them to the front of the wreath 

Here is another look at the steps and the finished wreath. 


On my doors 


and Up Close - cute and Kitschy right>>>


I made the snowman, I had the tree and the deers and so all in total I spent 13.00 for the items needed to create both of these wreaths!!!

And just like that another quick craft at a low cost is down in the books.

Enjoy and hope you are creating awesome holiday crafts!!!


Thursday, October 27, 2016

Quick craft-making tags

Now when I say quick craft I mean fairly quick. Once you start making these you'll make them for every occasion. The coolest part of these tags are that you can make them using the things you have on hand such as acrylic or wooden stamps and ink pads and tags that you can either die cut or buy from me - in my shop (wink wink)


As you can see by the photo - seriously I only used basic supplies - but I mean how cool are these tags. Can you imagine all the possibilities???

The best part about these tags is that they are so versatile and can be used, depending on the occasion, for gift tags to add to your gift bags (in place of a card) they can be added to a bottle of wine for a hostess gift and they can be used as place cards for your Thanksgiving table or any other special table setting.

Hope you try it out and if you do please share them on Instagram and tag me so I can check them out.

Happy Crafting!
xo
T