
Cute, right?
This is a step by step photo tutorial with all the details and supplies needed - let’s get started


Paint paper mache ball any color you like
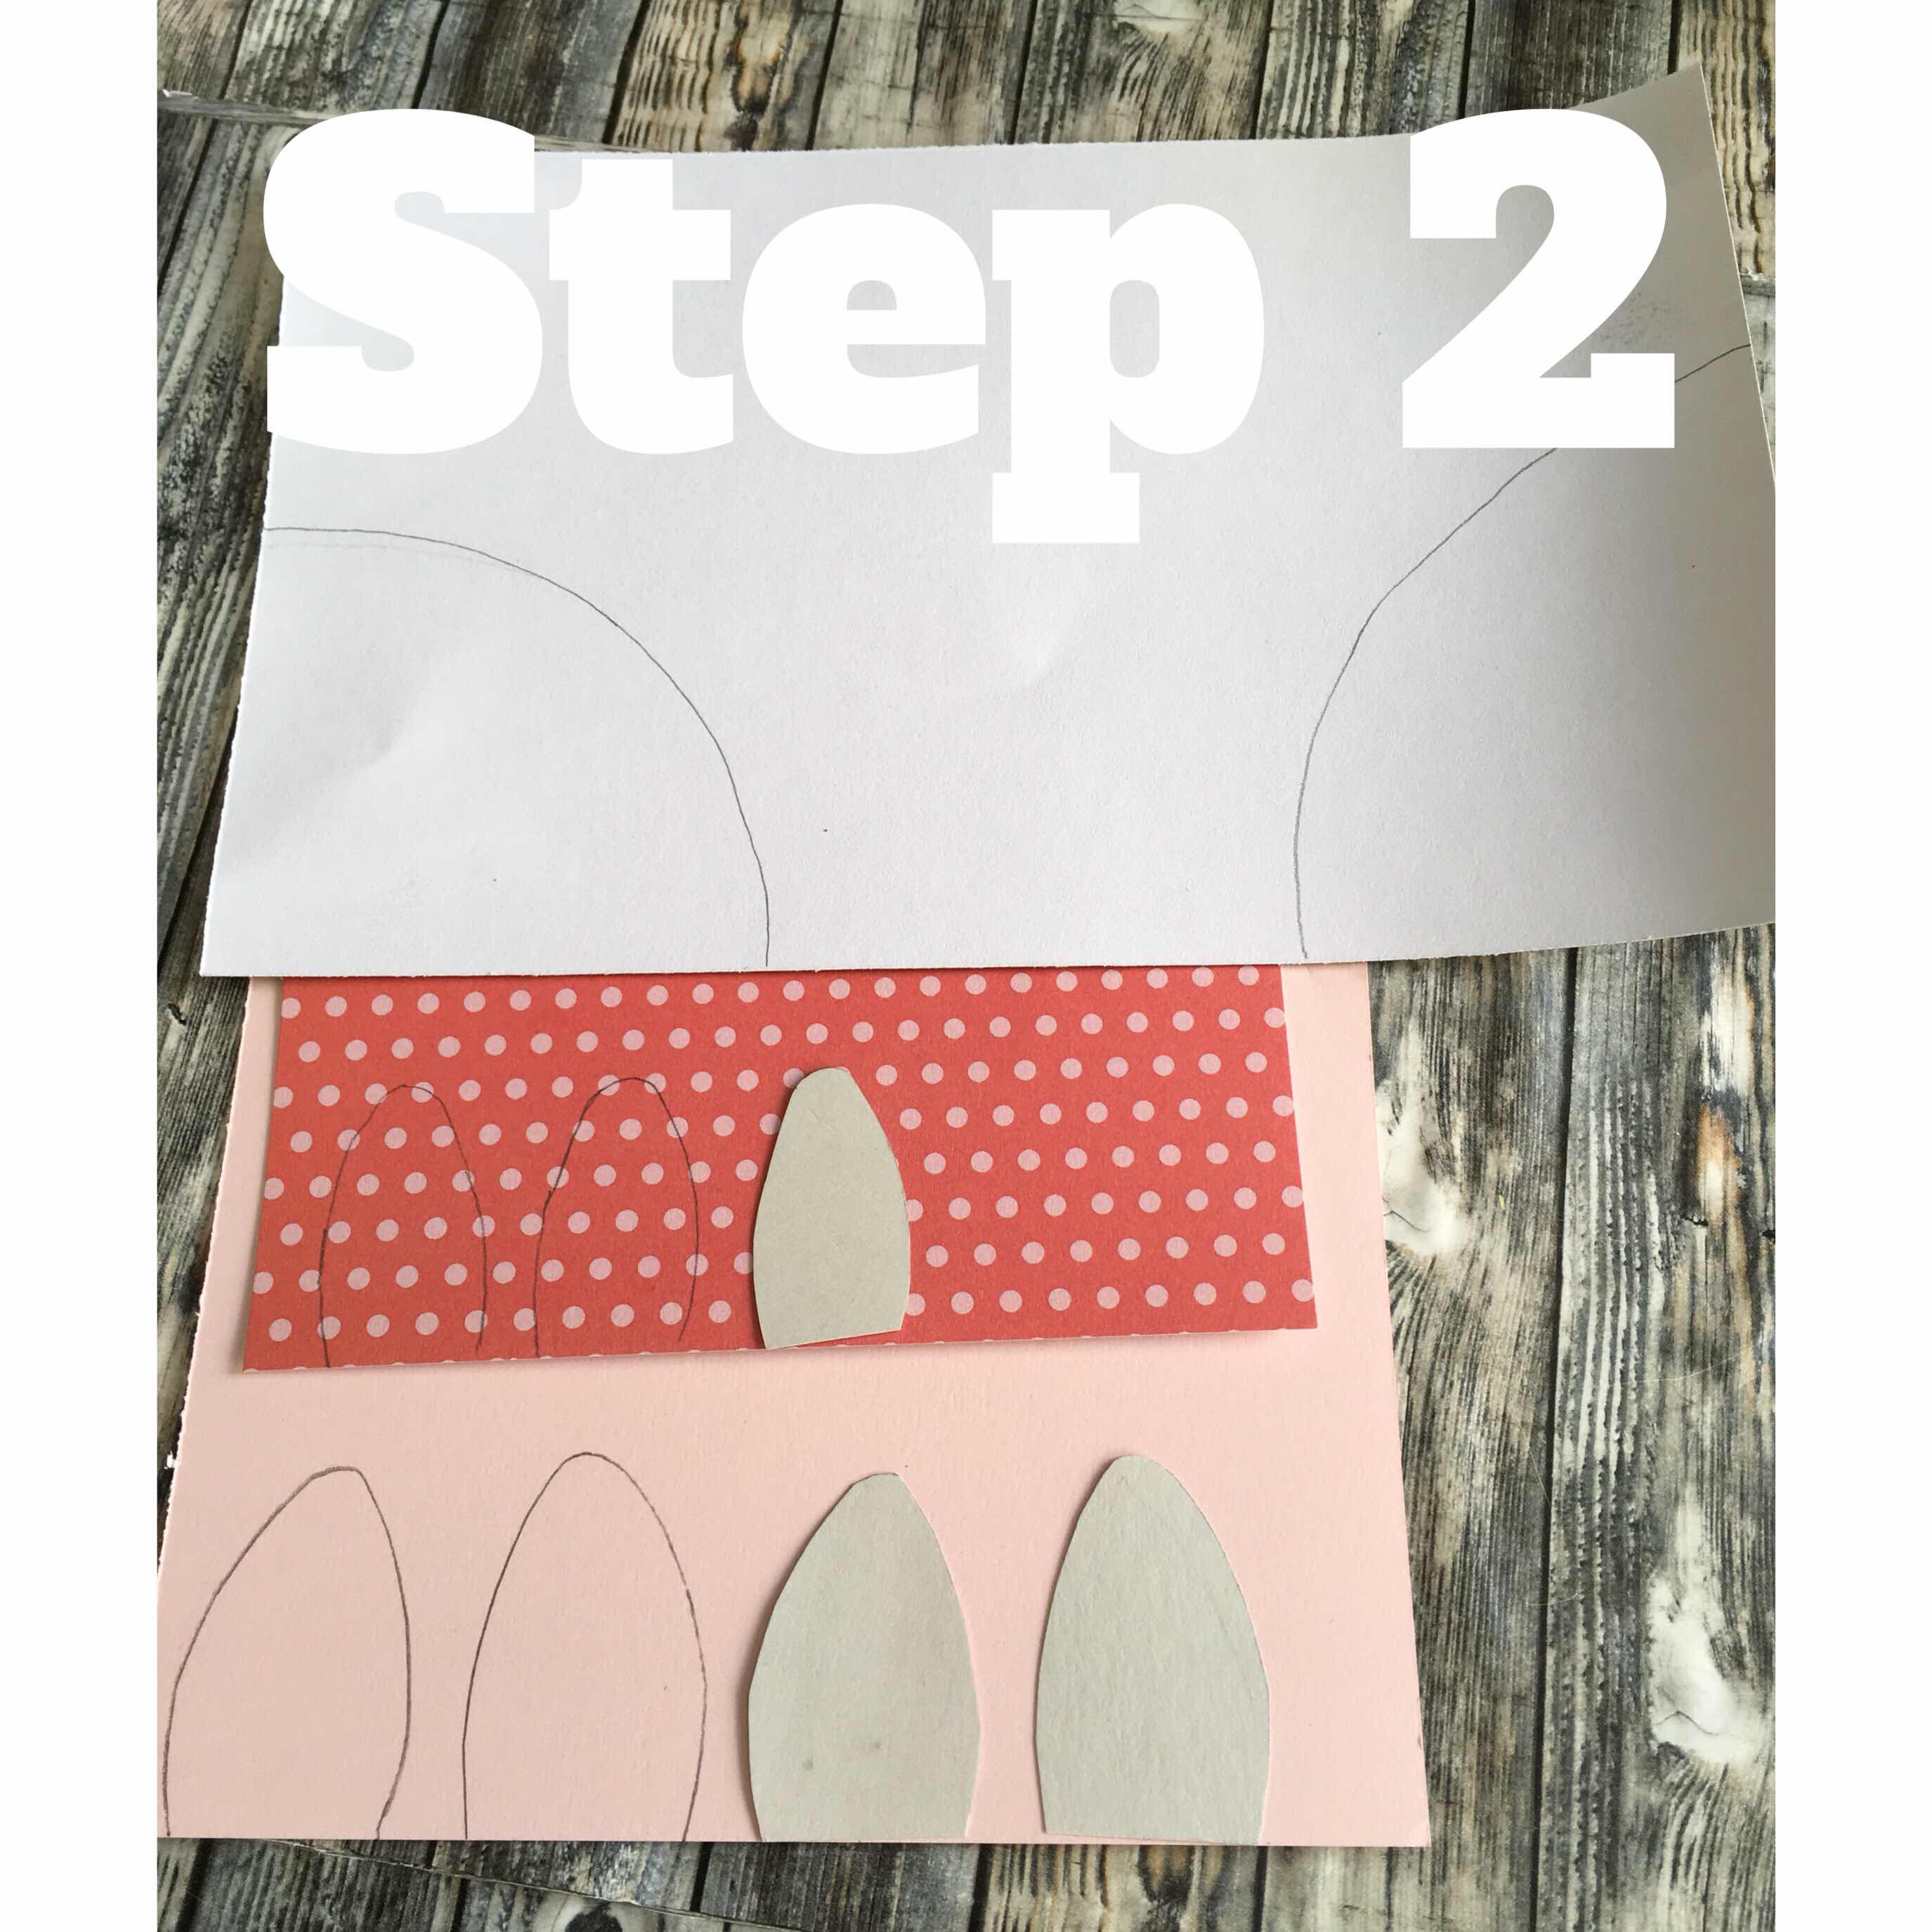
Trace and cut out the ears and horn out of the papers as seen in the photos

Once you cut out the pieces the wars should set into each other - glue them down to one another then make a small 1/2 inch or smaller crease as shown in #2 then cut a small slit in the bottom fold as shown in #3 then glue with the glue gun as shown in #4

Then glue your cone together - notice the small hole at the top - you’ll need that to pull the gold hanger thread thru

Once your done with the come add the eyelashes - these very basic but super easy - I used sharpie and as shown in the last photo I made them In different sizes and it all looks cute.

Add the horn with hot glue - let it dry - Next step is to pull the hanger thru - I used a large eye needle and put the string thru and thread the needle thru the horn and wa-la - easy!
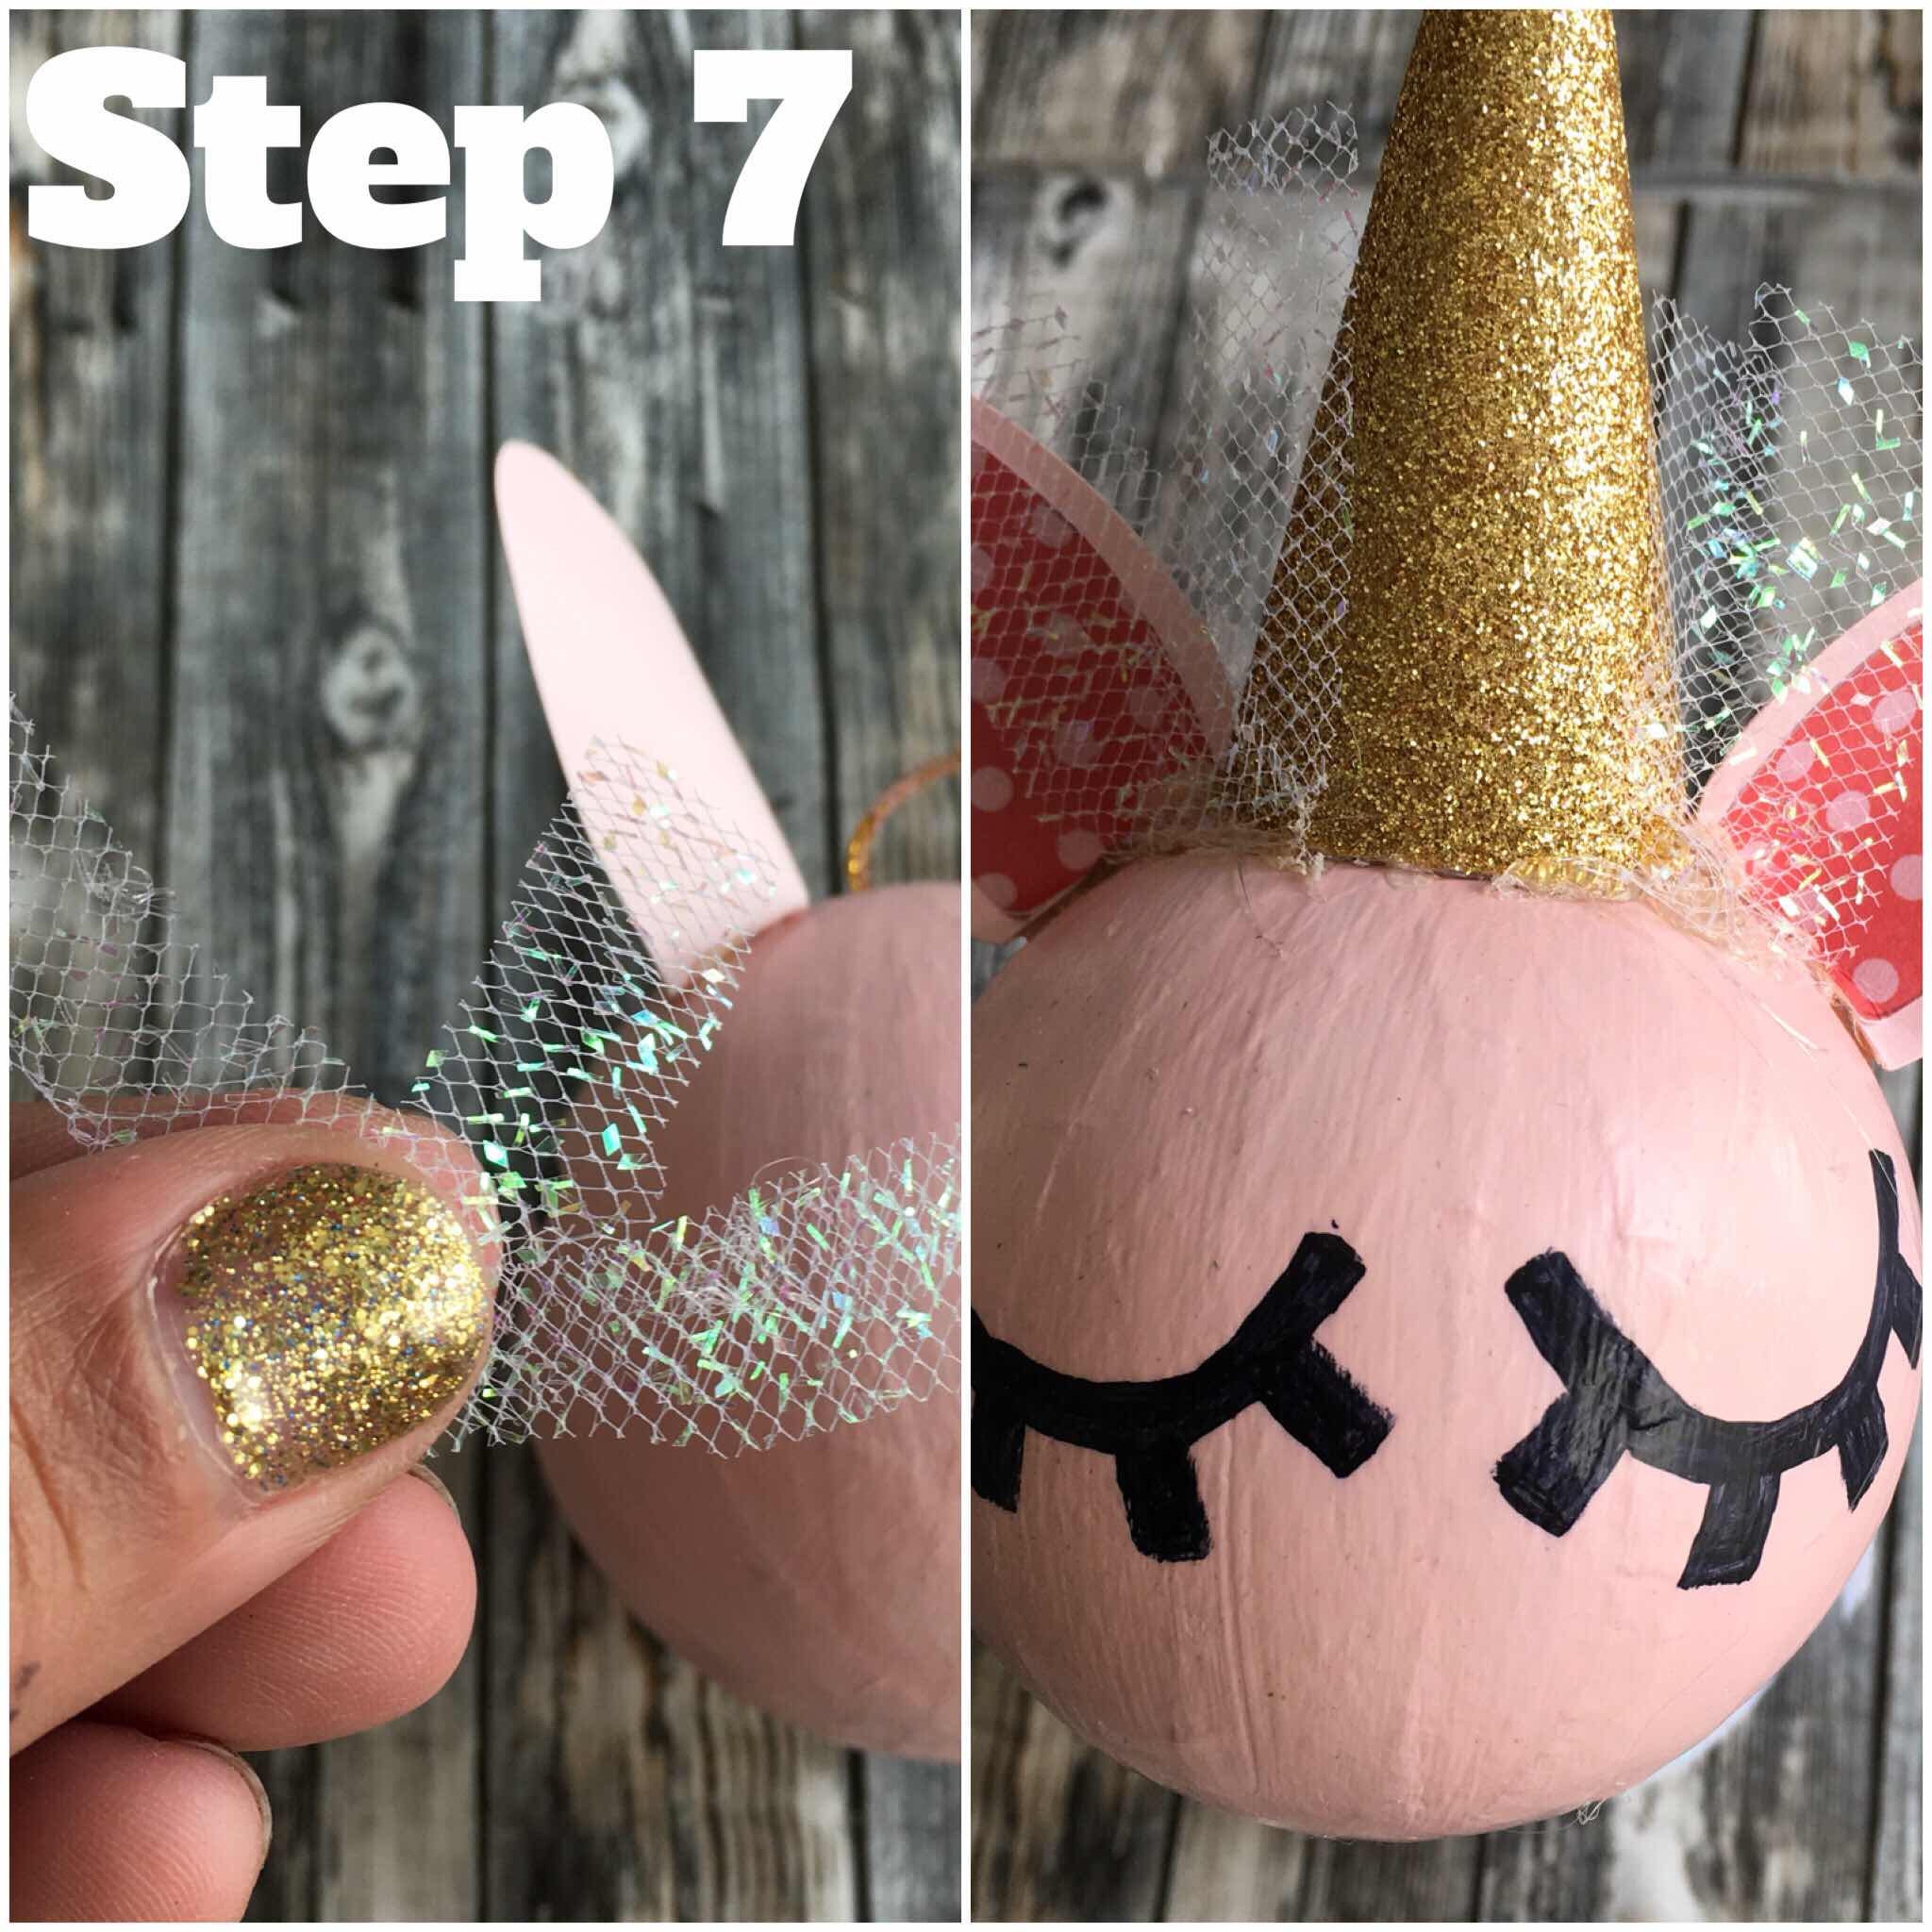
Next cut small pieces of tule and place them between the horn and the ears with hot glue

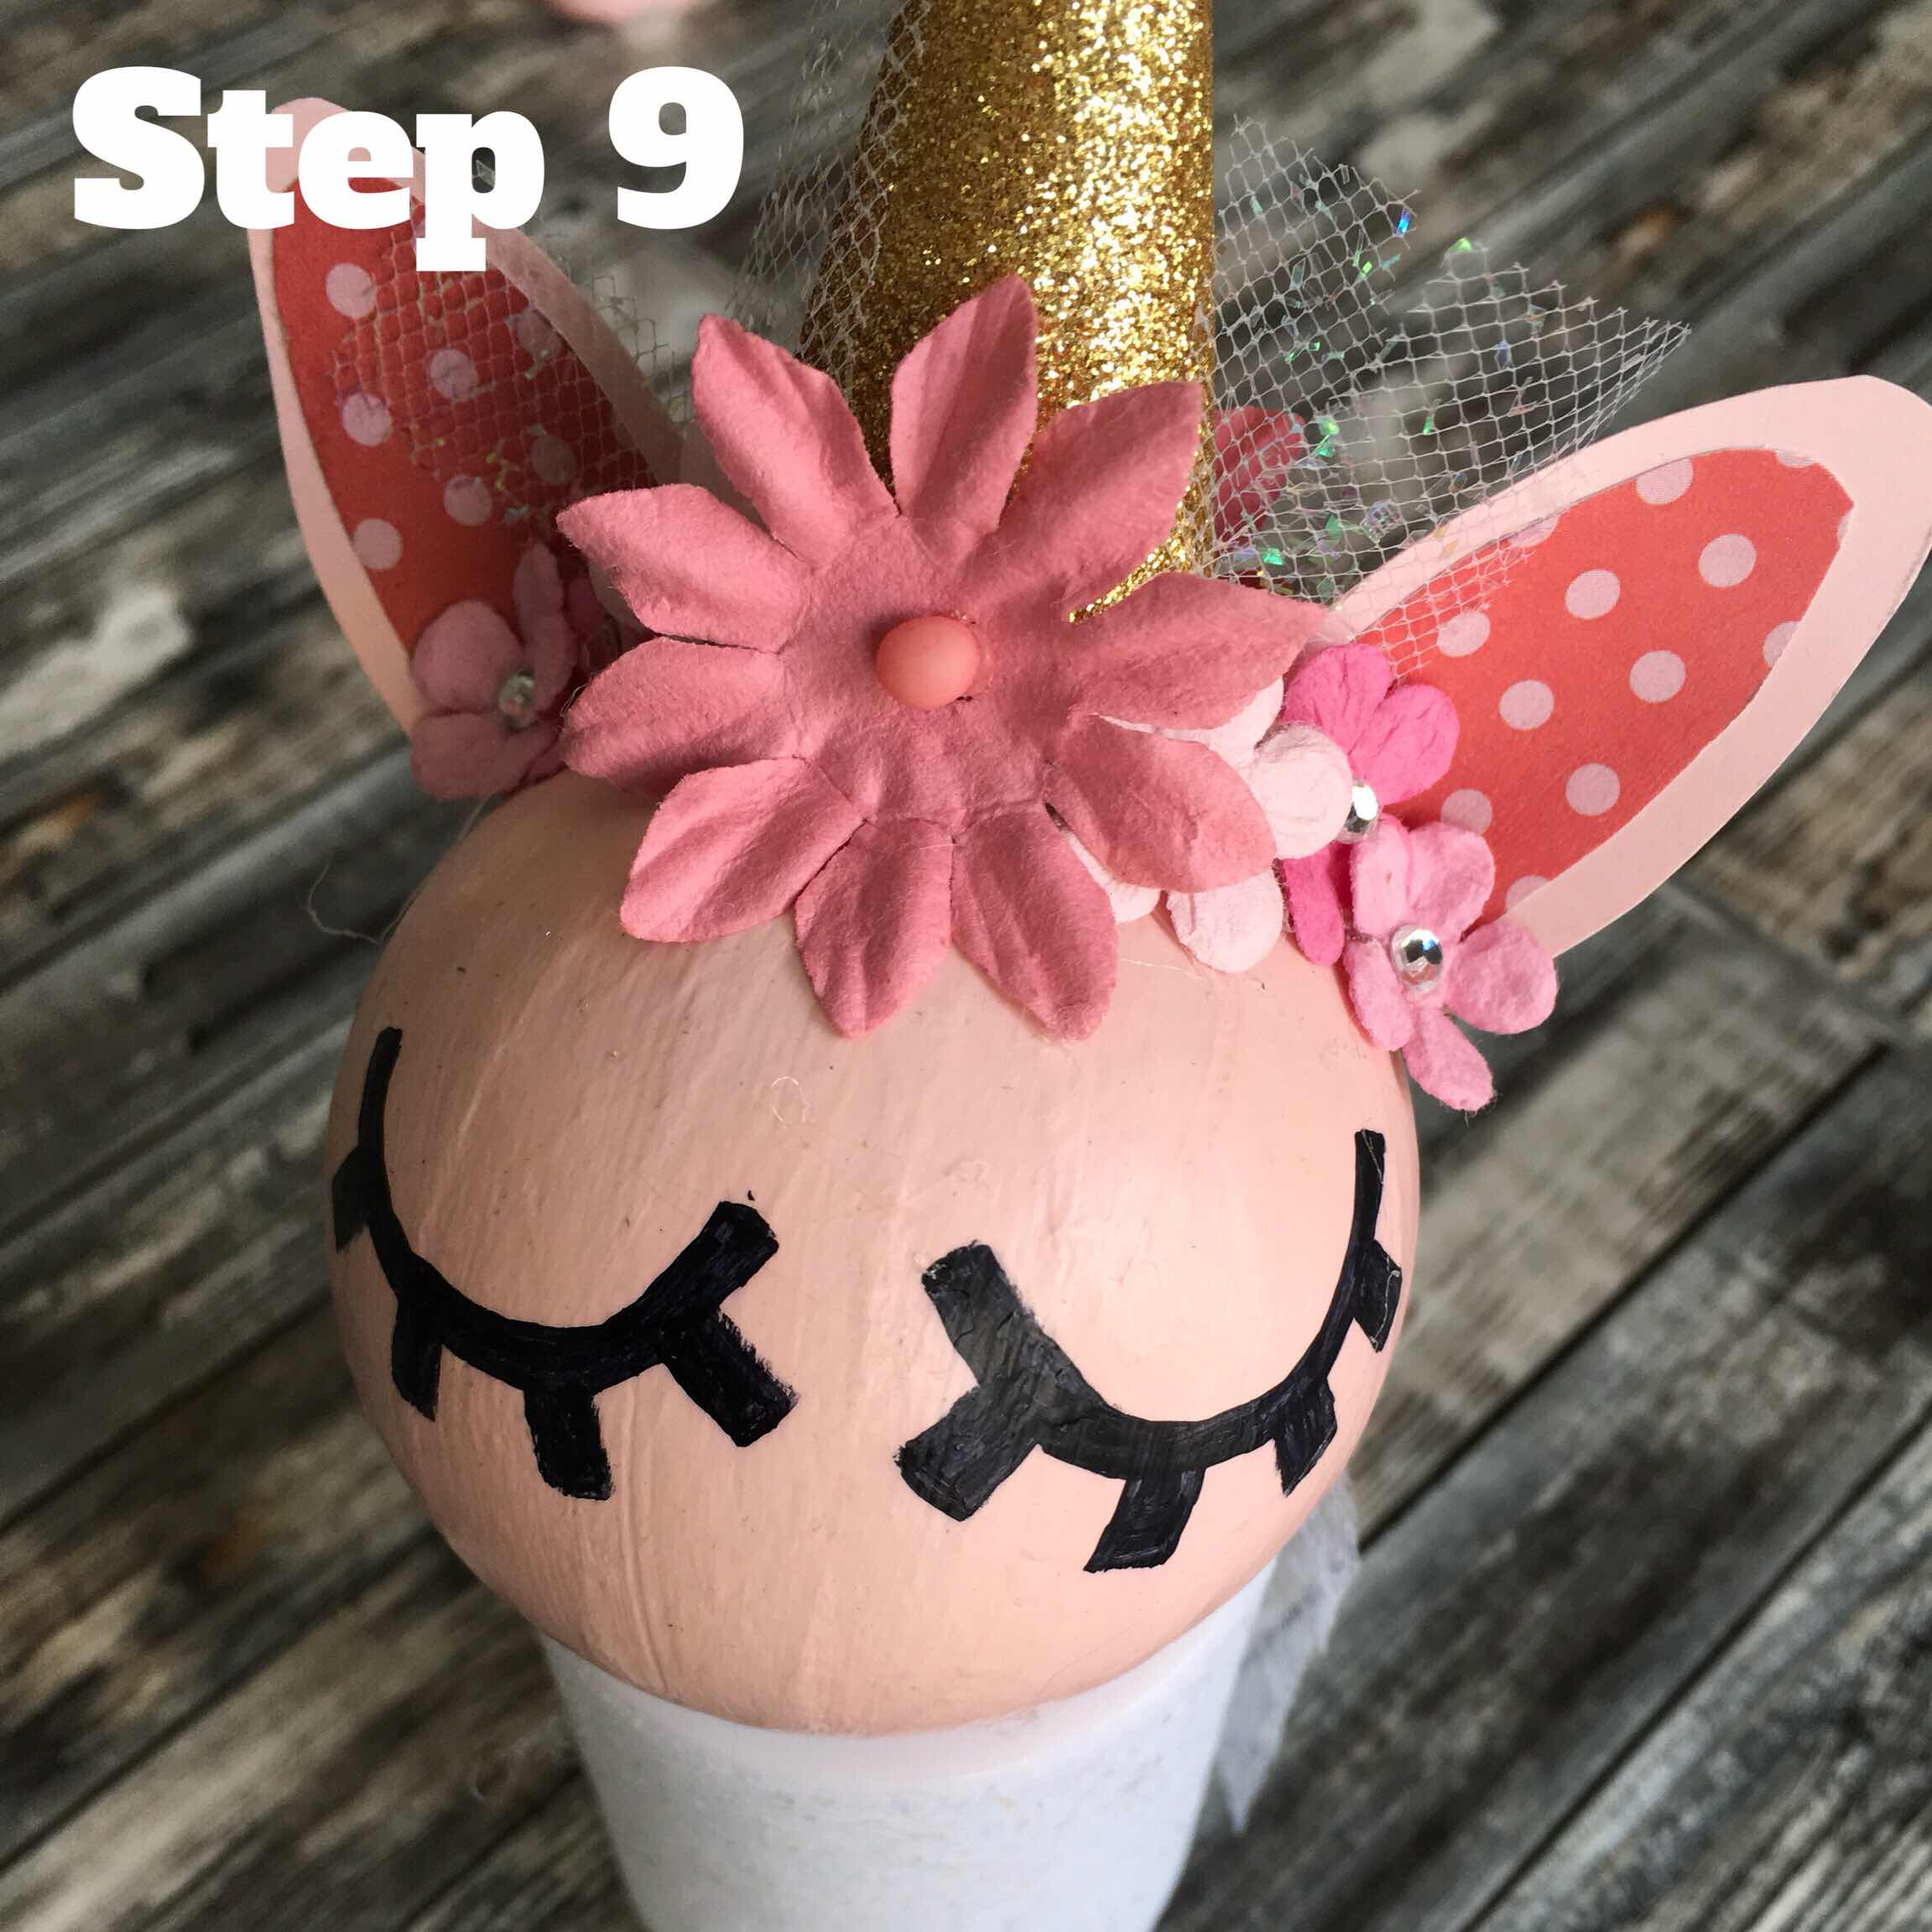
Almost done - now add the flowers - I went with one big one in the middle and smaller ones around the front - this covers up all the glue spots left after adding the horn and the ears - my flowers had small holes in the center and you can add puffy paint to the center or some small bling
I wanted you to see the two different unicorns I made in the same colors and using the same basic materials - changed the papers and the eyes but cute none the less.

Thanks for stopping by - hope you like the tutorial - let me know if you make one so I can come by and check it out!
xo
Tina
No comments:
Post a Comment